How Many Solar Panels Do I Need To Power a House in...
One of the first questions homeowners ask when going solar is “How many solar panels do I need to power my home?” The goal for...
Read More
Six Years of Solar: Lessons Learned to Help You
After working in the solar industry for well over a decade, in June 2019, I made the decision to install solar panels on my house....
Read More
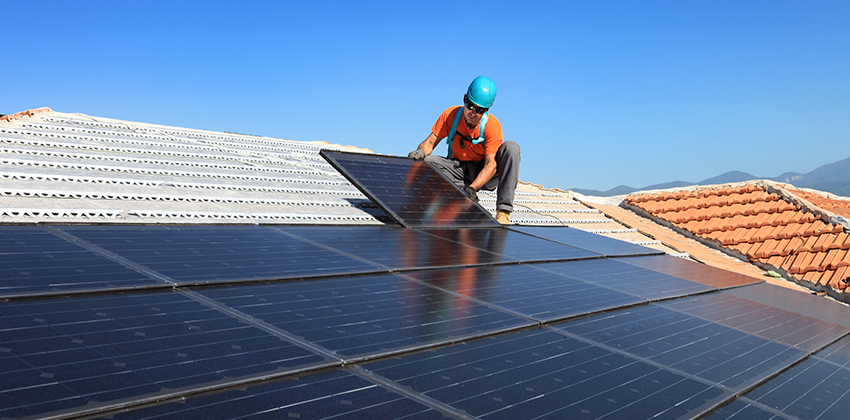
Solar Panels on a Flat Roof: 5 Things to Know
Can you install solar panels on a flat roof? Yes, you can successfully install solar panels on the flat roof of your home or business....
Read More
What Is the Best Roof Design for Solar Panels and What If...
If you’re looking to go solar at home, chances are you’re going to put those panels up on your roof. Ground-mounted solar is a great...
Read More
The Best Roof Materials for Solar Panels - 5 Common Materials
One of the first questions you’ll be asked in the process of going solar is, “What is your roof made of?” Solar can be installed...
Read More
How Long Do Solar Panels Last on a House?
Like buying a house, solar panels are a long-term investment. The longer you own them, the greater the return on investment. In fact, if you...
Read More
Meet the Energy Companies Topping the Inc. 5000
Last month, the annual Inc. 5000 list was published on Inc.com. The list ranks businesses based on their revenue growth from 2013 to 2016, and...
Read More
The Value of Custom Designed Solar Systems
When customers come to us from other installers, they are always hesitant and anxious. Why? Because when you go straight to the installer they give...
Read More
3 Questions To Ask Before You Go Solar
Most solar installation companies provide financial projections to homeowners estimating what their savings will be twenty or twenty-five years after the time of installation....
Read More
The Influence of Women in the Solar Industry
It’s International Women’s Day! Today we recognize and celebrate women all around the world. As a member of Solar.com’s female population, it’s necessary for me...
Read More
Who Are The Best Solar Panel Manufacturers?
You are a savvy consumer who wants to make sure you find the best solar panels for your home. In a lot of instances,...
Read More
2021's Top Solar Monitoring Systems
Household solar monitoring systems change the abstracts of power generation and consumption into graphics and numbers you can scroll through on an app. Hardware connected...
Read More
2021's Best Home Solar Mounting Systems
Solar panels and backup batteries get all the attention. But there’s another important piece of equipment to the home solar equation: mounting systems. These sturdy...
Read More
How To Choose The Best Solar Panels in 2023
Solar panels last a very long time and technology is always improving. How do you decide which panel is the right fit for you? Should...
Read More
Our Solar COVID-19 Guidelines
Solar.com is committed to providing our customers with the best customer service experience in the solar industry. In light of the ongoing developments around the...
Read More
U.S. Installed Solar Capacity: 2 Million Milestone
According to the most recent data released by Wood Mackenzie Power & Renewables and the Solar Energy Industries Association (SEIA), the residential solar market in...
Read More
Solar Subcontractors: Should I use one to go solar?
So, you’re interested in starting a solar project and now you’re wondering, “who should be doing the installation work?” Well, more and more companies...
Read More
5 Most Popular Solar Panels Chosen by Homeowners in 2018
Homeowners demand a lot from the solar panels they select for their rooftop system. These panels need to look good and perform well over multiple decades! Here...
Read More
Better Looking Solar Panels: System Aesthetics Comparison
As a homeowner, solar panel efficiency and cost may not be the only two factors you’re considering when deciding whether or not to go...
Read More
Brooklyn Solar Works Solar Canopy: The Comprehensive Review
As everyone knows, space is tough to come by in New York City. The same holds true when designing rooftop solar arrays. The city is...
Read More
8 Awesome New Technologies from Solar Power International 2018
Today, the Solar.com team took a break from our solar designs for a quick trip down to Anaheim for Solar Power International 2018. We...
Read More
The Essentials of Passive Solar Home Design
In the process of designing a home, there are a number of strategies that can be implemented to minimize the amount of energy required to...
Read More
South Korea's Q CELLS to Open Georgia Solar Factory
In the wake of US tariffs on non-domestic solar modules, Q CELLS is opening a solar module factory in Georgia. The South Korean company announced...
Read More
What Direction Should My Solar Panels Face?
When you make the decision to install a solar panel system at your home, there are going to be several questions on your mind. How...
Read More
India Gets Serious About Solar
According to Indian Prime Minister Narendra Modi, India is on track to install 200 gigawatts of renewable capacity by 2020. The country is fully embracing...
Read More
Can My Solar Panels Withstand a Hurricane?
If you live in an area that experiences extreme weather like hurricanes, hail, thunderstorms, blizzards, heavy winds and more, then you should take the...
Read More
Why Are Solar Panels Blue?
If you have ever driven through a residential neighborhood in states like California, Arizona, North Carolina, or any of the other top states for solar,...
Read More
What Solar Options Are There Besides Rooftop Solar?
When you think of solar, you probably imagine a solar panel-lined rooftop. For many homeowners, rooftop solar is usually the way to go. But it...
Read More
Brand Battle: Hyundai vs. Panasonic Solar Panels
Hyundai and Panasonic are trusted brands and they’ve both expanded into the solar panel industry. Offering quality products for two different price points, each brand...
Read More
Why New York Loves SunPower Solar Panels
New York loves its Yankees — and its Sunpower solar panels. A recent review of the Solar.com platform showed that homeowners in New York state...
Read More
Should I Get a Solar Thermal System Instead of a PV System?
When you hear about installing solar, you’re most likely hearing about PV (photovoltaic) solar cell panels. They’ve become standard in the industry. PV solar cell...
Read More
How to Conduct Due Diligence on Your Solar Project
Once you’ve decided to install a solar panel system at your home, the next thing to focus on is conducting the proper due diligence on...
Read More
How Utility API Works With Your Utility and Solar Company
Utility API provides software to accelerate the clean energy movement. They do this, in part, by offering secure data on a homeowner’s energy usage to...
Read More
What's the Size of a Solar Panel? Solar Panel Size and Weight...
If you are thinking about installing a solar panel system at your home, one of the first things you must consider is how much...
Read More
American Solar Panel Manufacturers - 2018 Complete List
There are many reasons why a consumer may want to purchase their solar panels from an American manufacturer or from American Solar brands. They want...
Read More
A Guide to Solar Panel Mounts
Solar panel mounts are a common component of almost every solar panel array. Although there are newer solar panel technologies coming out that do not...
Read More
Top 5 Solar Panels Selected Through Solar.com in 2017
Curious which solar panels are selected most on the Solar.com platform? As an online marketplace connecting quality solar companies to customers, we stay neutral...
Read More
SunPower Solar Panels vs. LG Solar Panels - 2018 Update
SunPower and LG are two of the top companies making solar panels. You’ve probably come across them in your research, and you’re wondering which will...
Read More
How Blockchain And Solar Can Work Together
Many would consider 2017 to be the year of cryptocurrency. Coins like Bitcoin, Litecoin, Ripple and dozens of others have shot up 1,000%+ and do...
Read More
The Craziest Solar Technologies Coming in 2018
Solar technology has been in existence since 1876 when William Grylls Adams and his student researcher discovered that you can produce electricity by exposing selenium to...
Read More
3 Solar Panel Innovations to Look for in 2018
Solar energy is taking shape across industries and geographies. Engineers at top solar panel companies are hard at work developing innovations making solar even more...
Read More
6 of the Most Common Solar FAQs
Solar is now more affordable and practical for the consumer than ever before, and because of this, it is starting to make sense to think...
Read More
An Overview of Panasonic's Solar Panel Offerings
With all of the advances in the solar industry, it is getting more practical and affordable to start using solar. In fact, the price of...
Read More
5 Reasons to Consider a Career in the Solar Industry
Solar energy, unfortunately, is still viewed as an alternate power source. However, in spite of this designation, it is quickly becoming the primary source of...
Read More
Installing Solar in Nepal
Working in the energy sector in America can be fast paced. It is primarily focused on reducing homeowners energy bills. Cost is king. My days...
Read More
How To Properly Evaluate Solar Panel Companies
There are so many details to take into account when choosing the right solar system for you. One of the most important factors is,...
Read More
Installing Solar On Spanish Tile Roofs
Spanish tile refers to the style of the tile, not the material. Spanish tile is usually made of either clay or concrete. Installing a solar...
Read More
Invisible Solar Cells - What Are They?
We have come a very long way from the first line of solar panels. Despite their sustainability, the first solar panels were not the most...
Read More
Solar Panels For Boats and Yachts
The purchase of a boat or a yacht is a coveted purchase for many people. While it certainly adds a new dynamic to one’s life,...
Read More
Amazon Has Finally Decided To Become A Leader in Renewable Energy
Back in 2015, Greenpeace did a sophisticated research project on the sustainability of the top tech giants in the United States. It covered many areas of sustainability,...
Read More
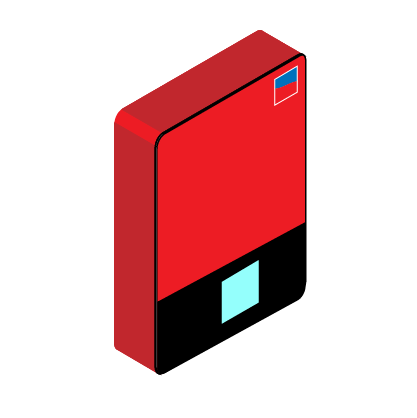
Solar Backup Power - Will My Solar Panels Work in a Grid...
Solar photovoltaic panels are created to absorb the sun’s energy and convert it to usable AC energy in your home. You may be wondering then,...
Read More
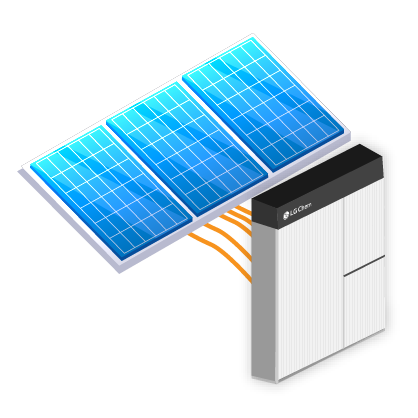
A Review of LG Solar Panels - When Brand Name Does Matter
LG is a brand you may already be familiar with. They are a South Korean multinational manufacturer that makes televisions, mobile devices, tablets, smartwatches and...
Read More
Will Tesla's Solar Panels Change The Industry?
On October 28, 2016, Elon Musk unveiled Tesla’s solar roof product – a line of roof tiles and shingles with embedded photovoltaic cells. To an...
Read More
Electrical Panel Upgrades for Solar: A Technical Case Study
John Smith is a homeowner in California looking to reduce his electric bill by going solar and he decided to call an installation company that...
Read More
SunPower Solar Panels vs. LG Solar Panels
If you are considering installing a solar system at your home or place of business, then you have many factors to consider. The paramount factor...
Read More
Is SunPower Still The Best Solar Company For Solar Panels?
You’ve heard of SunPower, LG, SolarWorld, Q CELLS, and maybe even Canadian Solar, but which one is the right fit for your home? To figure...
Read More
What Trump's Presidency Means for the Solar Industry
The election of Donald Trump to the office of President of the United States is expected to have a profound impact on the future of...
Read More
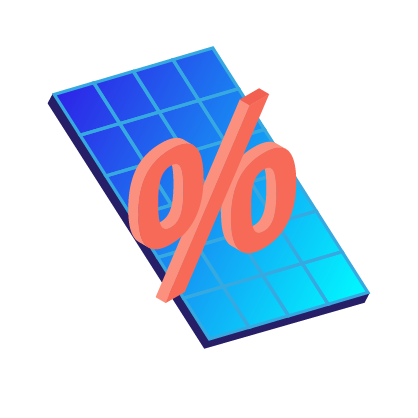
Importance of Power Tolerance in Solar Panels
This paper highlights the importance of power tolerance when choosing solar panels. Power tolerance is a measure of how much electrical power a solar panel...
Read More
Gauging the Bankability of Small to Mid-Sized Solar Installers
The entire world is going green and moving toward cleaner sources of energy. California hosts a flourishing solar industry with a burgeoning number of solar...
Read More
Ann Arbor Takes Steps to Promote Residential Solar
Home to Michigan’s largest solar panel array of 1.1 MW and one of the top green research universities in the country, Ann Arbor has a...
Read More
Measuring Home Energy Use
One of the most important steps before installing home solar is figuring out how much energy your home uses, and how big your solar energy...
Read More
Three Things to Avoid When Installing Your Solar Panel System
At Solar.com, we have a lot of experience in the solar panel industry. Every day we help people to install panels on their homes, and...
Read More
The Benefits of Floating Solar Panels
Floating solar panels utilize the same technology as the panels that you put on your roof. The main difference is that they’ve been adapted...
Read More
The Top Three Solar Manufacturers
At Solar.com, we believe in supplying quality equipment for our customers. In the last twenty years, solar technology has grown exponentially, costs have plummeted, and...
Read More
Elon Musk's Gigafactory Should Be Dictating Your Solar Equipment
All solar installations today should be thinking ahead to the not-so-distant future. The main question to be asking is whether your solar system will seamlessly...
Read More
The Solar “Tipping Point” is Looming
We all know why people go solar: investment purposes, immediate savings, environmental concerns, and grid independence. But who are these people? One of Malcom Gladwell’s...
Read More
4 Mistakes Homeowners Make When Going Solar
Buying a solar system for your home can be a confusing process. At Solar.com we’re committed to helping homeowners sort through it all and...
Read More
Solar Installation Horror Story
The following letter is from a very reputable company in Solar.com’s installer network to a homeowner who was unfortunately taken advantage of by an installer...
Read More
Bankability: What it Means and Why it is Important for Your Solar...
Homeowners who are considering solar typically overlook the manufacturer of their solar panels, despite this being one of the most important factors for the longevity...
Read More
How ‘Big Data’ Will Change The Solar Industry
The U.S. Department of Energy invests in new technology to revolutionize the landscape of solar data. Reliable solar grid data, the true performance of solar...
Read More
Los Angeles Solar Installation Permit Process About to Get Easier
Here at Solar.com, we want to see solar panels on every compatible rooftop in the U.S. And while our plans for expansion are ambitious,...
Read More